
If you recently bought a Canon printer and are wondering how to Install My Canon Printer to My Computer, (call: +1-801-878-6858 USA) you are in the right place. Setting up a Canon printer is simple when you follow the correct steps. Whether you are using Windows or Mac, this guide will help you complete the installation process without confusion.
Installing your printer correctly ensures smooth printing, scanning, and wireless connectivity. Follow this complete tutorial to Install My Canon Printer to My Computer quickly and efficiently.
Step 1: Unbox Your Canon Printer
Before starting the installation process (call: +1-801-878-6858 USA), remove all packaging materials from the printer. Make sure you remove protective tapes, plastic covers, and foam inserts from both inside and outside the printer.
Inside the printer box, you will usually find:
Canon printer
Power cable
Ink cartridges
Setup CD
User manual
Place the printer near your computer and close to a power outlet.
Step 2: Power On the Printer
Connect the power cable to your Canon printer and plug it into the electrical outlet. Press the power button to turn on the device.
Wait a few minutes for the printer to initialize. Some models may ask you to select language and region settings on the display screen.
This is an important step before you Install My Canon Printer to My Computer because the printer must be fully ready before software installation begins.
Step 3: Install Ink Cartridges
Open the printer cover and carefully insert the ink cartridges into their correct slots. Push them gently until they click into place.
After inserting the cartridges:
Load plain paper into the input tray.
Allow the printer to perform an alignment process.
Wait until the setup process finishes completely.
Proper cartridge installation ensures high-quality printing after you Install My Canon Printer to My Computer.
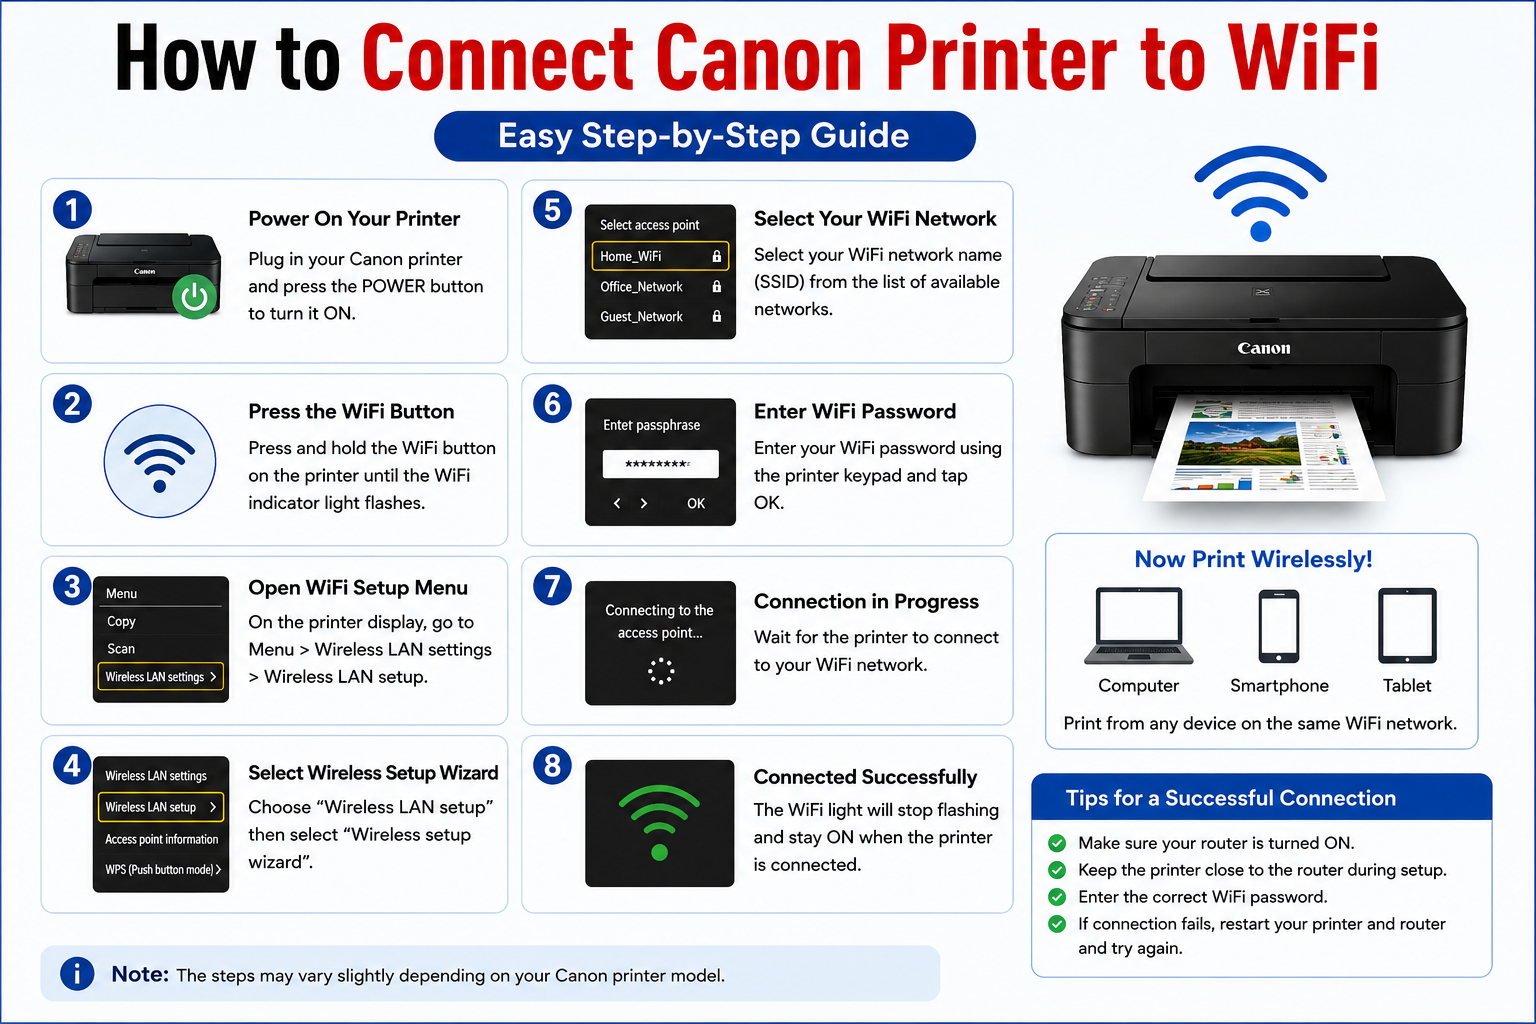
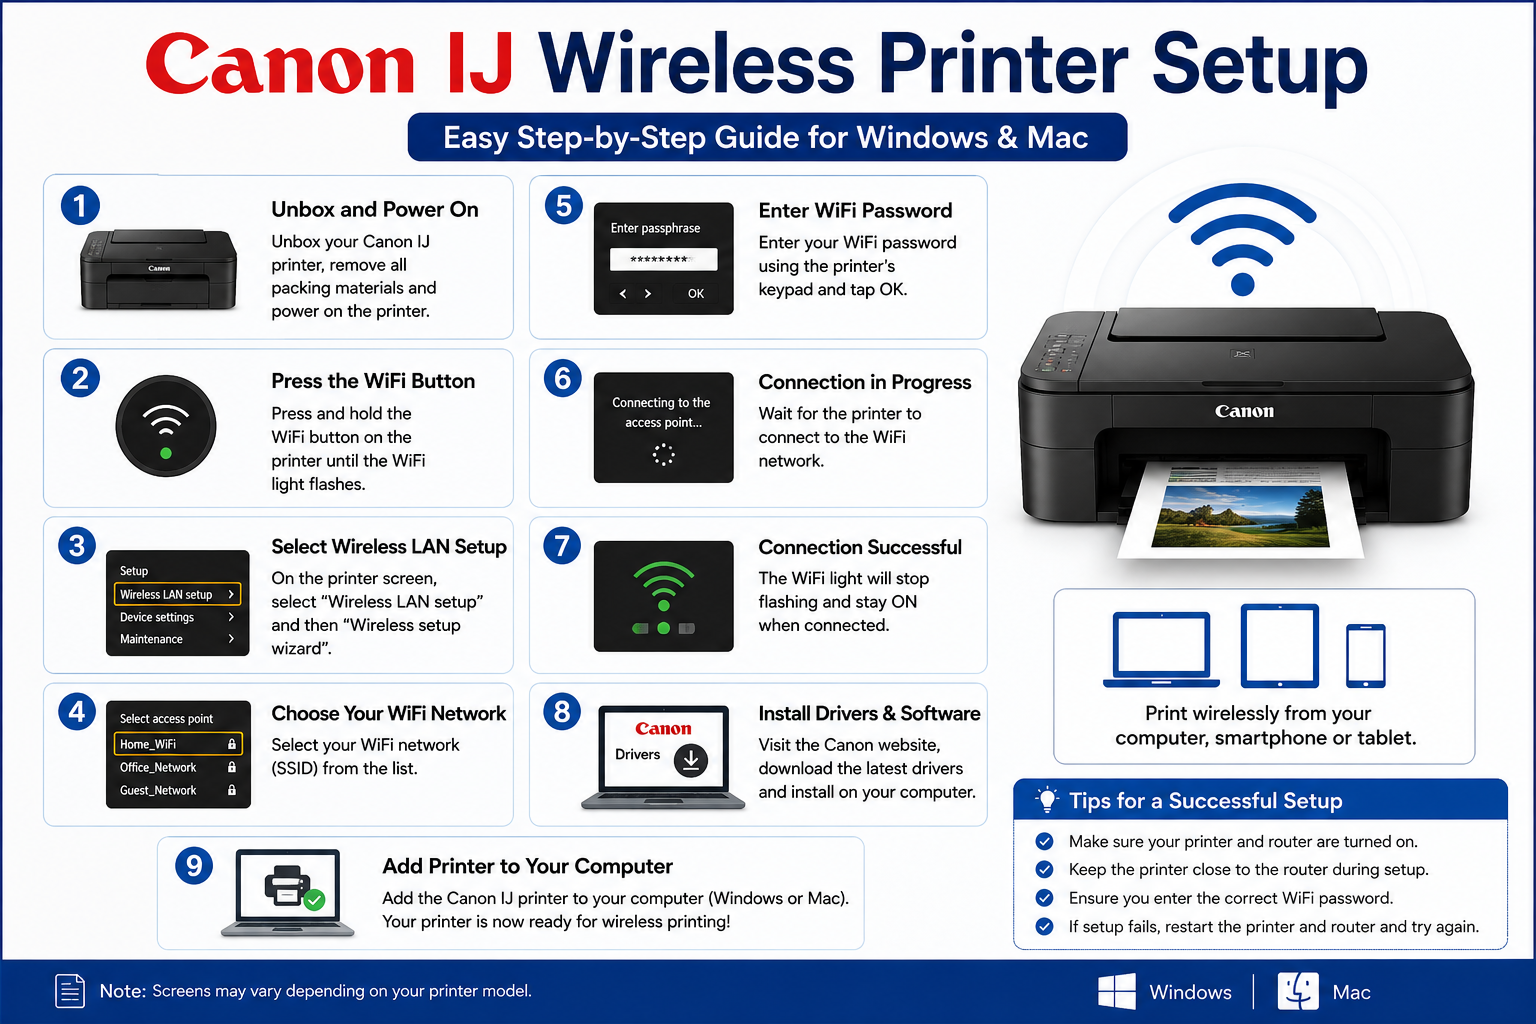
Step 4: Connect Canon Printer to Wi-Fi
Most modern Canon printers support wireless connectivity. To connect your printer to Wi-Fi:
Press the Wi-Fi button on the printer.
Open the wireless settings menu.
Select your Wi-Fi network name.
Enter the Wi-Fi password.
Confirm the connection.
Once connected, the Wi-Fi indicator light should stop blinking and remain solid.
Wireless setup is useful because it allows you to Install My Canon Printer to My Computer without using cables.
Step 5: Download Canon Printer Drivers
To properly Install My Canon Printer to My Computer, you need the correct printer drivers.
Open your web browser and visit the official Canon support (call: +1-801-878-6858 USA) website. Search for your Canon printer model and download the latest drivers compatible with your operating system.
Choose the correct version for:
Windows 10 or Windows 11
macOS
32-bit or 64-bit systems
Downloading updated drivers improves printer performance and prevents compatibility issues.
Step 6: Run the Installation Software
After downloading the setup file:
Double-click the installer file.
Allow the program to make changes if prompted.
Follow the on-screen instructions.
Accept the license agreement.
Choose wireless or USB connection.
The installer will automatically detect your Canon printer and complete the setup process.
This is the main step to successfully Install My Canon Printer to My Computer.
Step 7: Add Printer to Your Computer
Sometimes the printer may not appear automatically after installation. You can manually add it.
For Windows:
Open Settings.
Click Devices.
Select Printers & Scanners.
Click Add a Printer.
For Mac:
Open System Settings.
Select Printers & Scanners.
Click the Plus (+) icon.
Choose your Canon printer.
After adding the printer, your system should recognize it immediately.
Step 8: Print a Test Page
To confirm the setup is successful:
Open Printer Settings.
Select your Canon printer.
Click Print Test Page.
If the page prints correctly, you have successfully managed to Install My Canon Printer to My Computer.
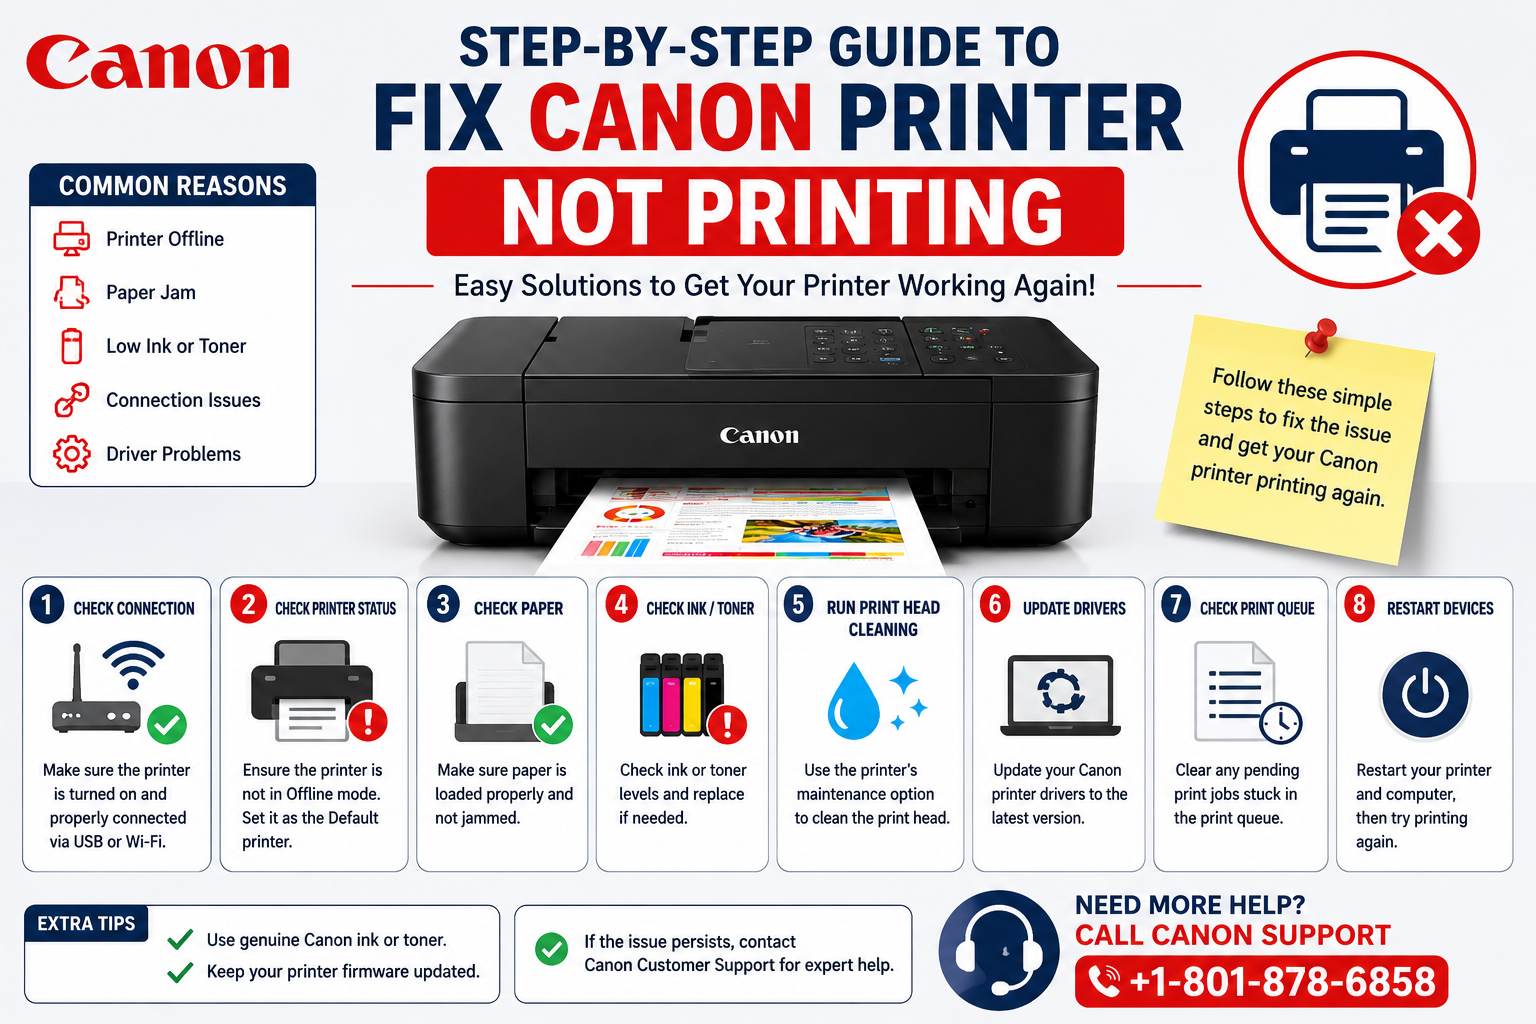
Common Installation Problems and Fixes
Sometimes users face issues during installation. Here are quick solutions:
Printer Not Detected
Restart the printer and computer.
Check Wi-Fi connection.
Reinstall drivers.
Driver Installation Failed
Download updated drivers.
Disable antivirus temporarily.
Run installer as administrator.
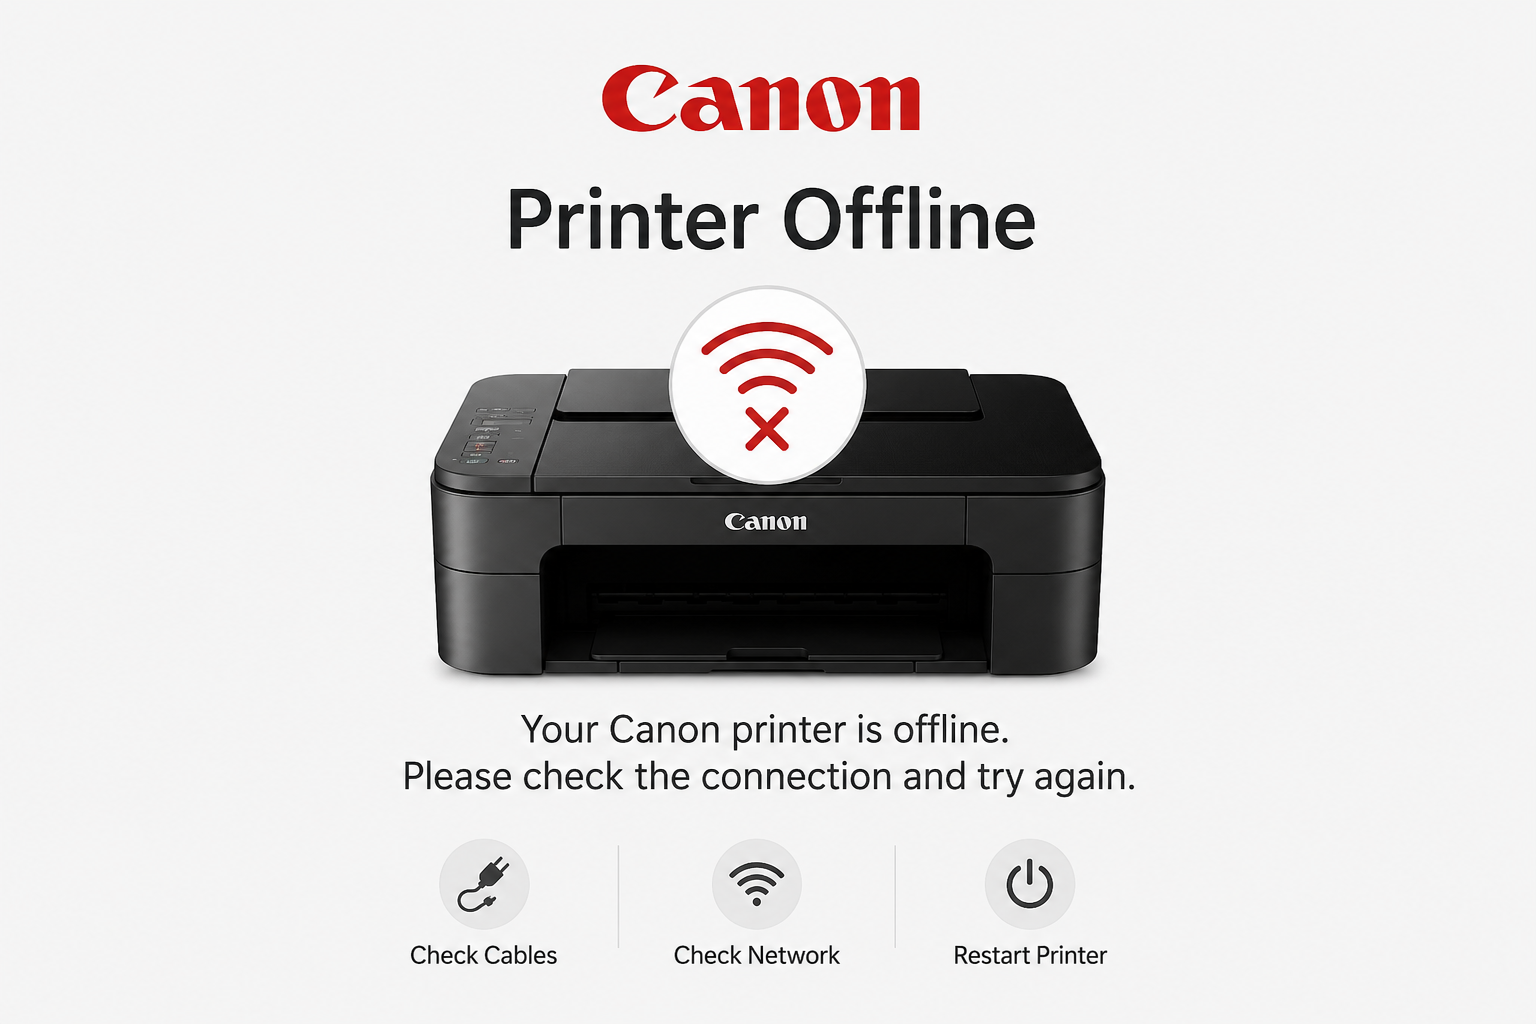
Printer Offline Error
Set printer as default.
Restart print spooler service.
Reconnect to Wi-Fi.
These troubleshooting steps can help if you experience problems while trying to Install My Canon Printer to My Computer.
Final Thoughts
Learning how to Install My Canon Printer to My Computer is easier when you follow the proper setup process. From connecting the printer to Wi-Fi to installing drivers and printing a test page, each step is important for smooth printer performance.


Write a comment ...